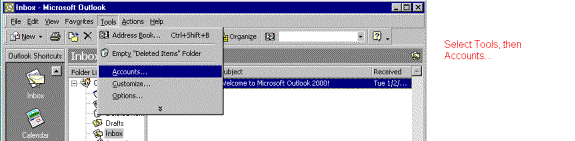
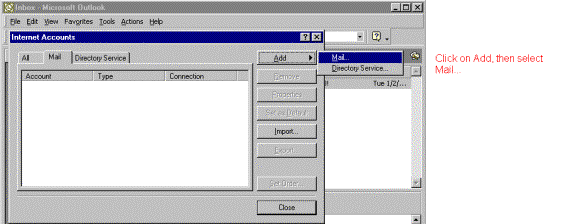
An Internet Accounts tabbed dialog box will pop up. Select Add Mail as shown below.
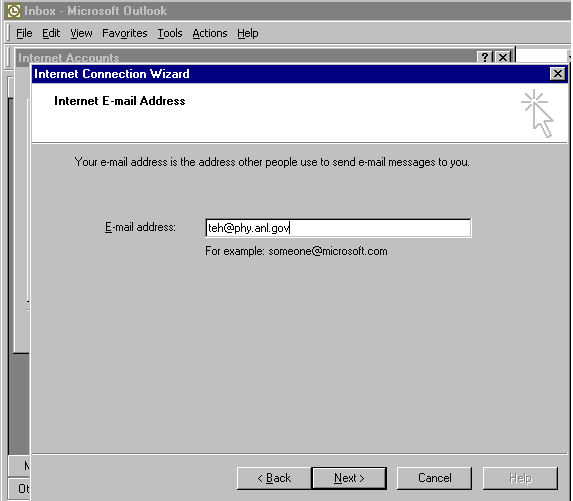
You will be led through a series of dialog boxes. Your email address is [email protected], where name is your account name. Enter these in the following dialog box.
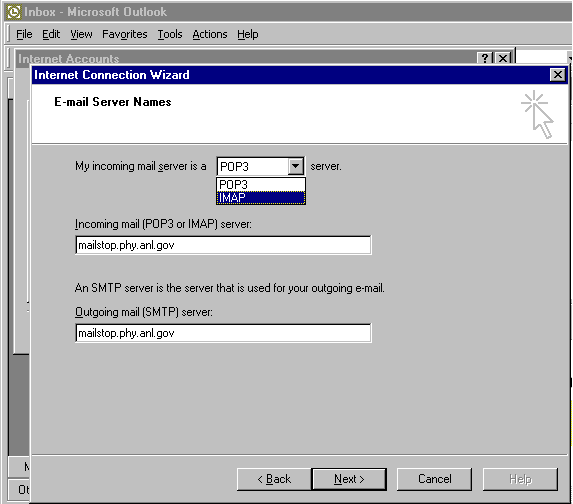
Your incoming mail server is mailstop.phy.anl.gov. Your outgoing mail server is also mailstop.phy.anl.gov. The mail server uses the IMAP protocol for handling email, so you will need to select IMAP as the server type. Enter these in the following dialog box.
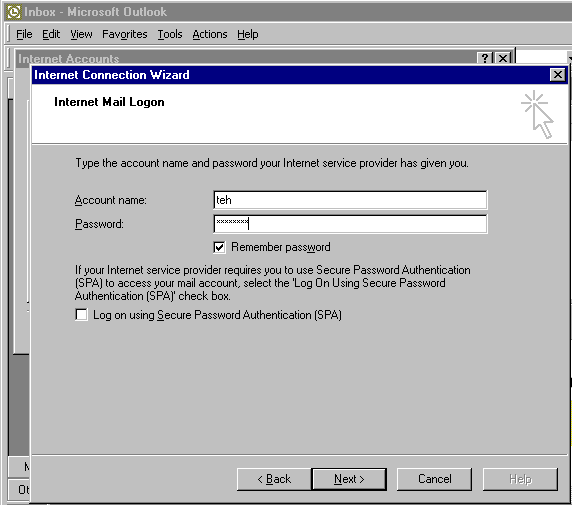
Enter your given password in the following dialog box. WARNING: If you configure the account on someone else's machine, DO NOT check the "Remember password" box.
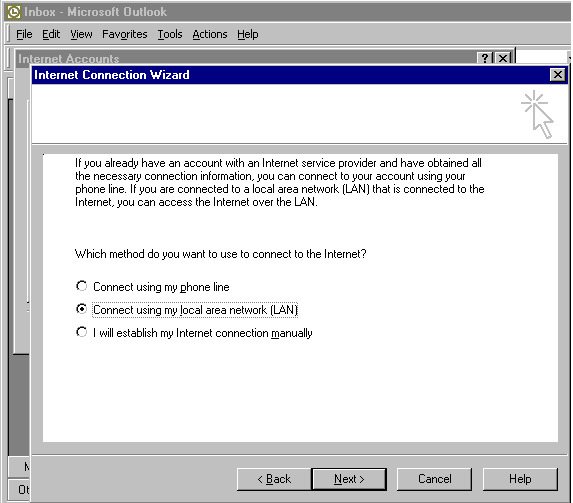
Within the division, your connection to the mail server is via a local area network connection. Check this in the following dialog box.
When you are finished, the Internet Accounts dialog box should contain an entry for your mailstop email account as shown below.
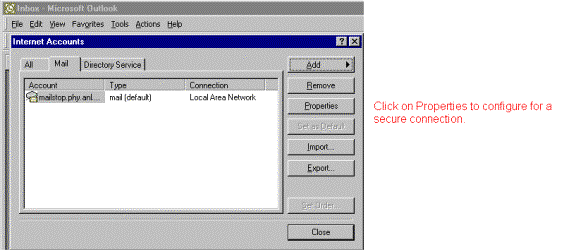
You will need to modify the properties of this account. Make sure the mailstop account is selected, that is, highlighted and click on Properties. It will bring up a tabbed dialog box as shown below. Select the Advanced tab,
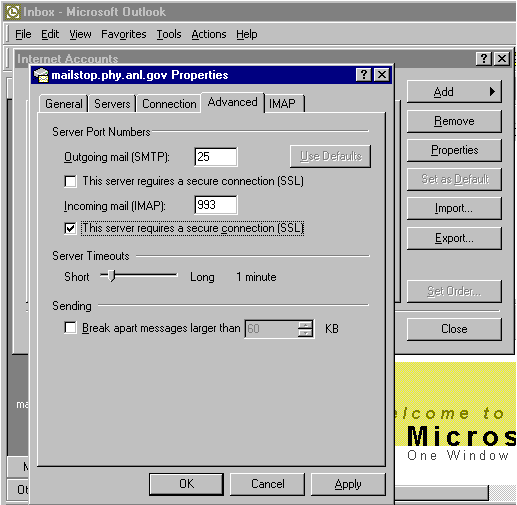
and check the secure connection option for Incoming mail. Do not check the secure connection for outgoing mail. Click OK. Then, close the Internet Accounts dialog. Your setup is complete.
WARNING: If you configure
this account on someone else's machine, you should delete the account after
you're done using it. If you don't, then someone else will be able
to access your email account on mailstop and read your mail!
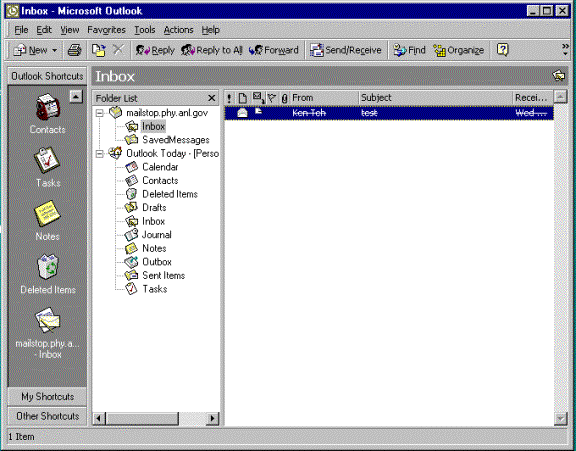
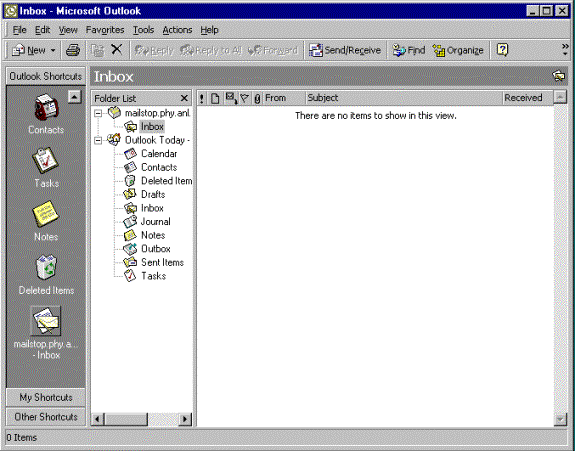
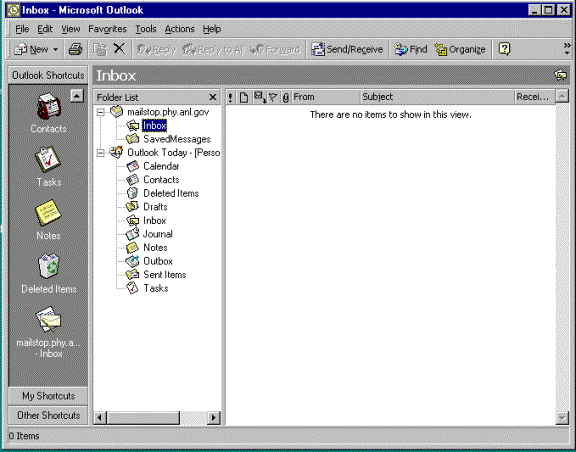
After completing your setup, you will find an icon labeled `mailstop.phy.anl.gov-Inbox'
in the Outlook shortcut bar. Click on the icon and you should see
the following screen.
Test drive your email account by sending yourself a test message. Click on New to compose a test message.
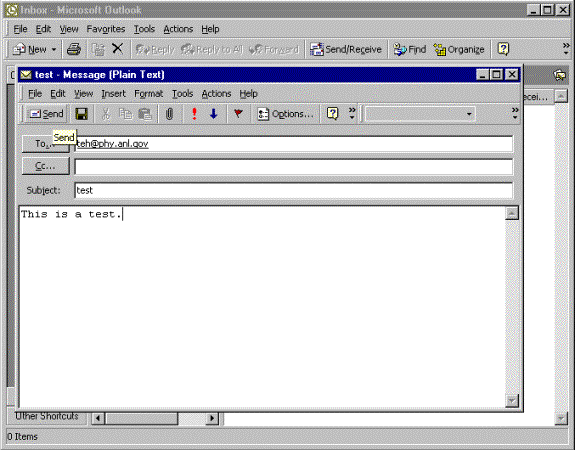
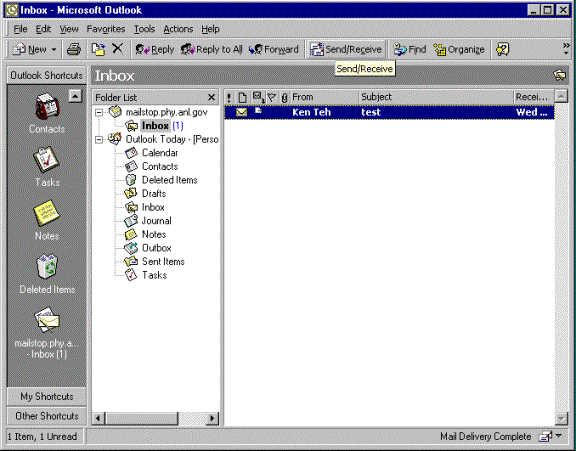
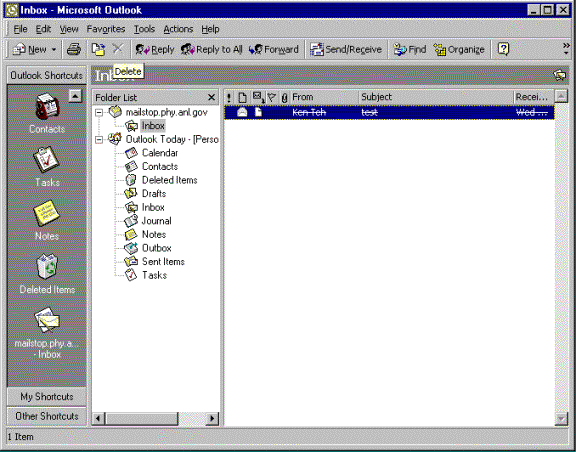
The To: field should be [email protected] where name is your account name. Click on Send to send the message. Then, click on Send/Receive to retrieve your messages from your mailstop account. If all is well, you should see the following screen with your test message listed.
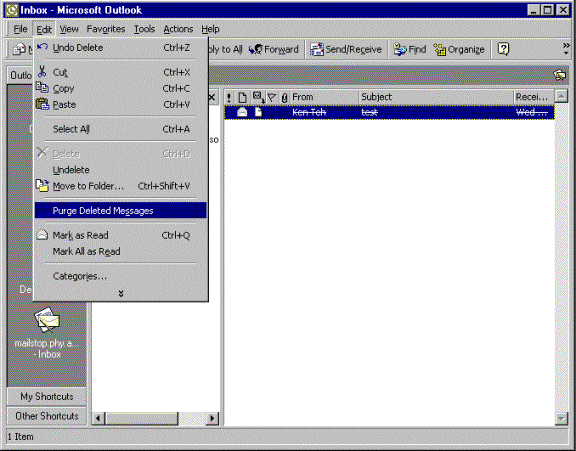
After you have read the message, you can delete it with the Delete button (labeled with an X). An email message that is deleted is crossed-out as shown below.
It is not physically deleted, only marked as deleted. To undelete the message, select Undelete from the Edit menu. To physically delete the message select Purge Deleted Messages from the Edit menu as shown below.
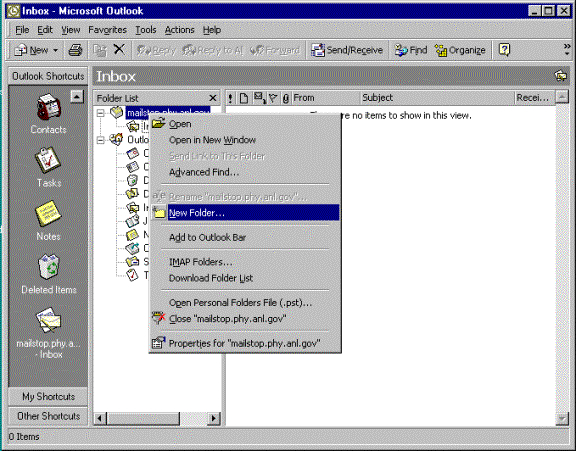
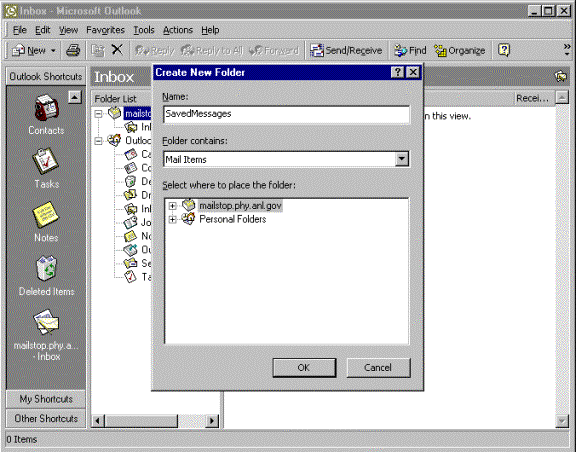
A pop-up dialog will appear as shown below. In this example, the new folder is called SavedMessages. Note that this new folder will be placed under the mailstop folder which is highlighted in the box below.
Click OK. You should then see the following screen. In the folder list, there are 2 folders under the mailstop folder: the Inbox and SavedMessages.
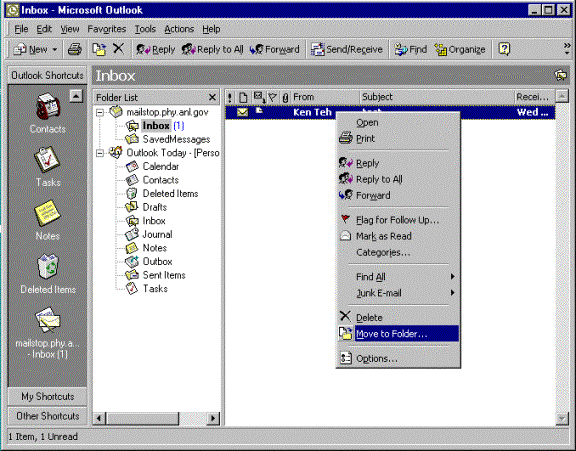
Compose and send yourself a second test message. After receiving it, you can right click on the message and select Move to Folder as shown below.
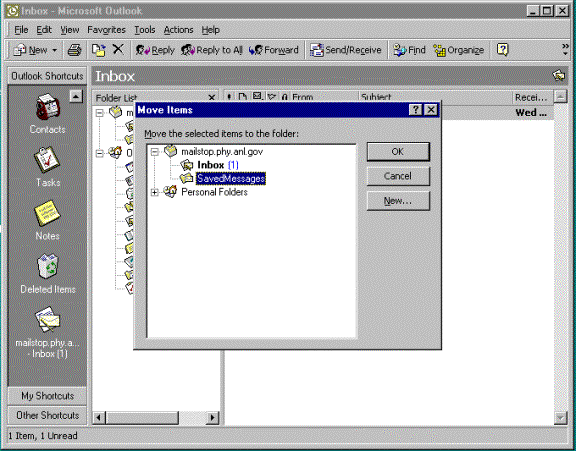
Select SavedMessages as shown below. Then, click OK to save it.
Notice that after saving the message, it is automatically marked as `deleted'. Remember to physically delete it by selecting Purge Deleted Messages from the Edit menu as described above.